TOOLS NEEDED FOR A PERFECT INSTALLATION OF THE MARIX FLOOR-MOUNTED PIVOT HINGE
1) Measuring tape
2) Plumb-bob
3) Flat-bottom plumb-bob
4) Screwdriver set
5) Impact drill
6) 1-1/2″(40 mm) diamond-tipped saw drillbit
7) 1/4″(6.5 mm) and 5/16″(8 mm) hardened metal drill bits
8) 5/8″(15 mm) and 3/8″(10 mm) drill bit keys
9) Hex keys
10) Wooden wedges
11) Marking pen
12) Padded toolbox
STEP 01
Check that the measures of the frame match the measures of the door. Maximum clearances for the doors are 3/8″ (10 mm) from the bottom and 3/16″(5 mm) from the sides and top.
STEP 02
Before you begin with the marking of the MARIX hinge and of the upper pivot, remember to check the wall’s perpendicularity with the plumb-bob. If the wall goes wide on the lower part, firstly mark the upper pivot. Otherwise, start with the hinge.
STEP 03
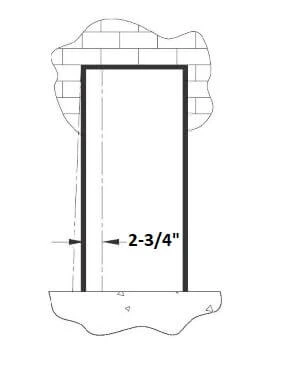
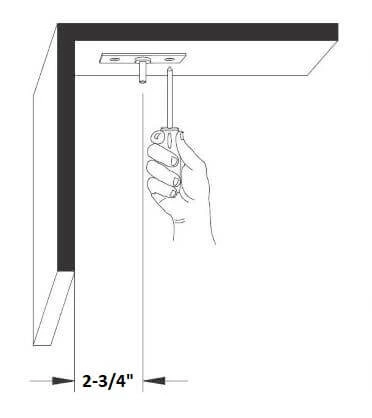
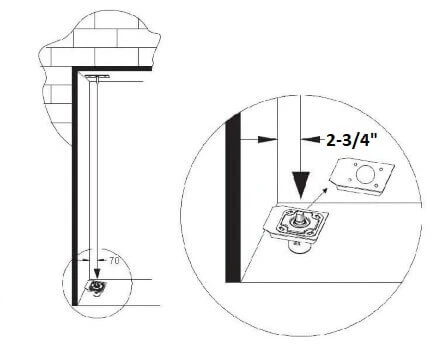
Mark the upper pivot, considering that the pivot axis has to be at a distance of 2-3/4″(70 mm) from the wall. After this marking is done, drill a hole and insert the ribbed plastic anchors.
STEP 04
Make the pivot center match the center of the MARIX hinge using the plumb-bob. Mark the hinge placement site using the template you will find on the inner side of the hinge box, placing the larger tab towards the wall.
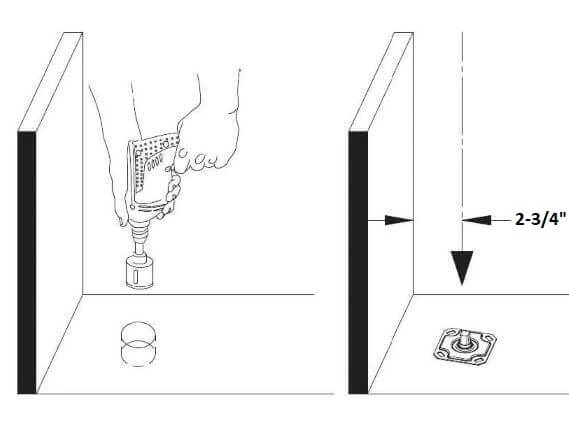
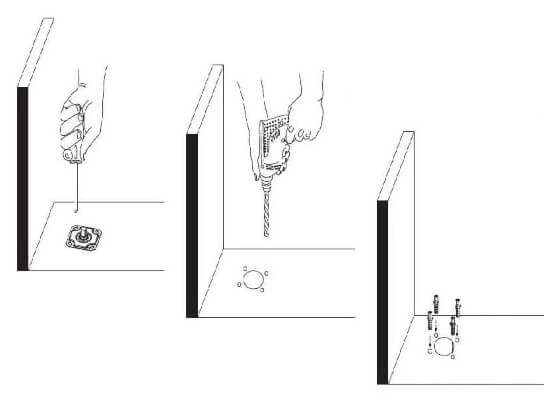
STEP 05
Drill a hole on the floor with a 1-1/2″ (40 mm) diamond-tipped saw drill bit up to a depth of 2-3/4″(70 mm). Thoroughly clean the hole, checking that the depth is the correct one. Insert the MARIX hinge on hole, level it to the floor and align it with the frame axis.
STEP 06
After placing the hinge, mark the center of the four hinge-affixation screws. Remove the hinge and drill the holes for the screws on the markings you have just made. Use a 5/16″(8 mm) videa drill bit to drill the holes. Once the holes are done, insert the ribbed plastic anchors.
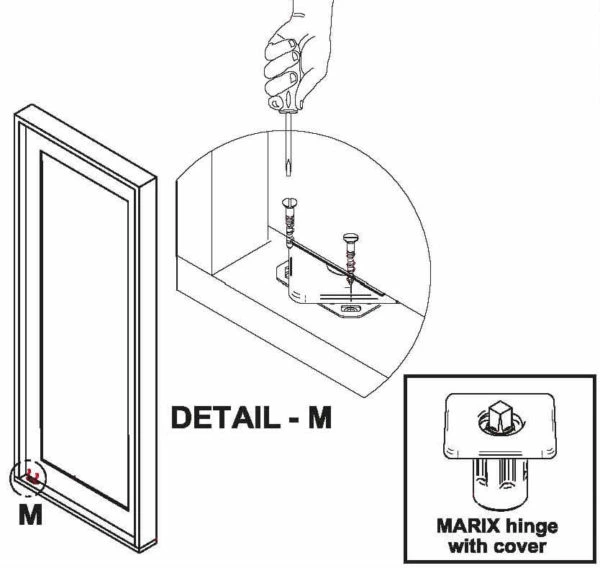
STEP 07
After the holes for the 4 screws have been drilled, insert the hinge on the central hole. Close the door, align the hinge and only then tighten the screws. After the screws are tightly in, correctly place the hinge cover over the MARIX hinge, as shown in the drawing. Congrats! Your MARIX hinge is now correctly installed.
STEP 08
Mount the glass door on top of the Marix door spring in the closed position. If the door is not properly aligned with the lock, loosen the screws, align the door to the lock and retighten the screws.
Your door with the new Marix closer is installed.

Installation Problems and Solutions
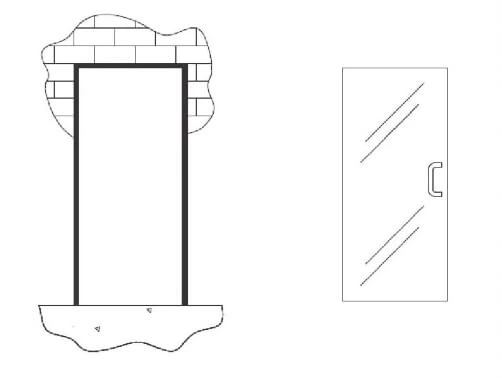
Marix Glass Door Closer
PACKAGE CONTENT:
• Marix Door Closer with Stainless Steel cover
• Installation manual
• Cardboard cradle (2x) – Template
• Warranty term
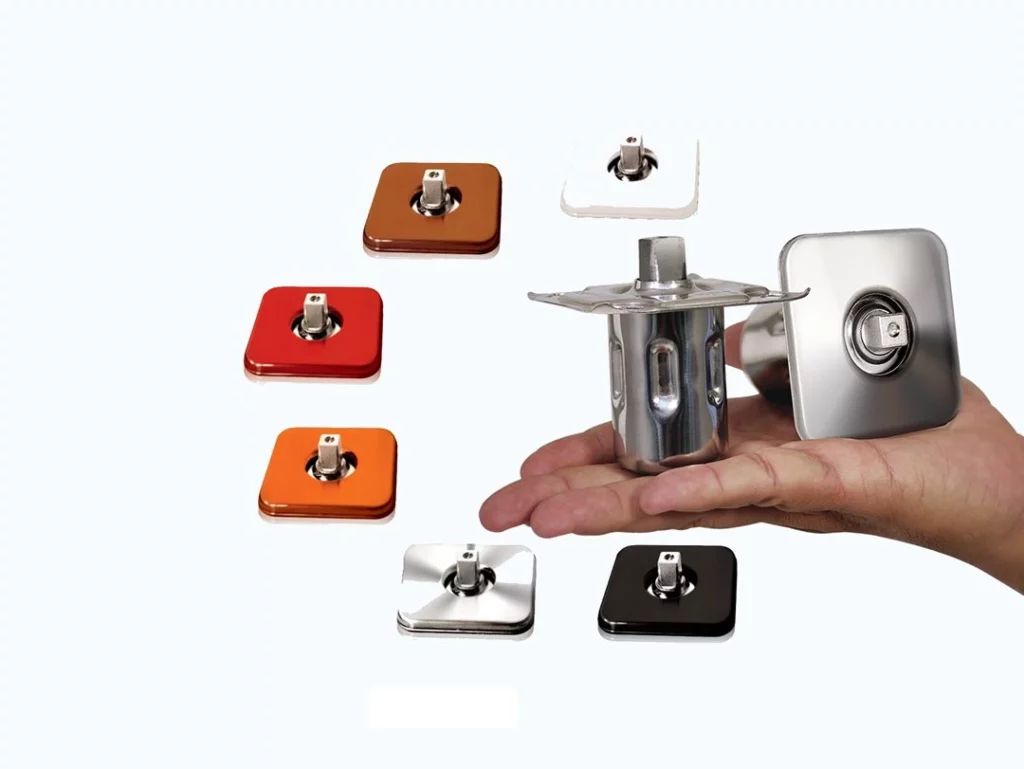
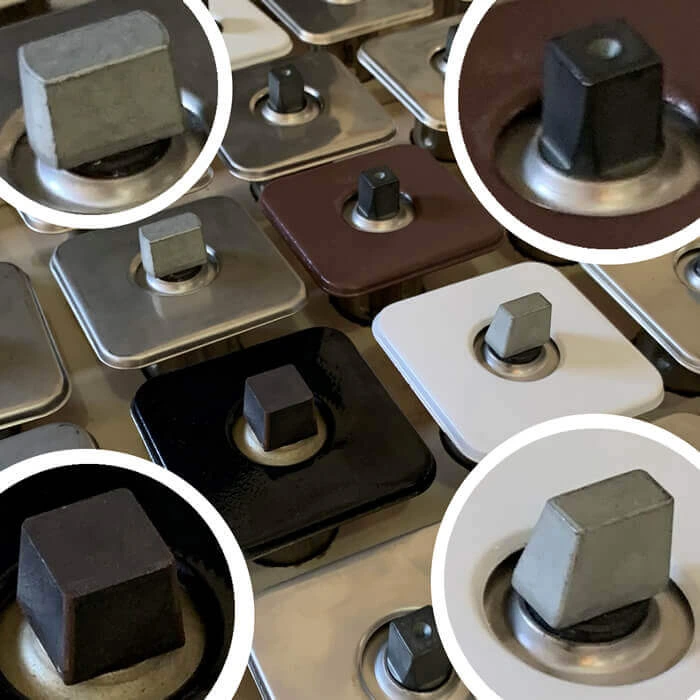
Marix Pivot Door Closer Colored Cover
New colored covers for Marix door Closers,
fit your ambient, and now even more discreet.
Available in many colors to meet your projects needs.
Become a Marix Distributor in Columbus United States
https://www.youtube.com/sh…
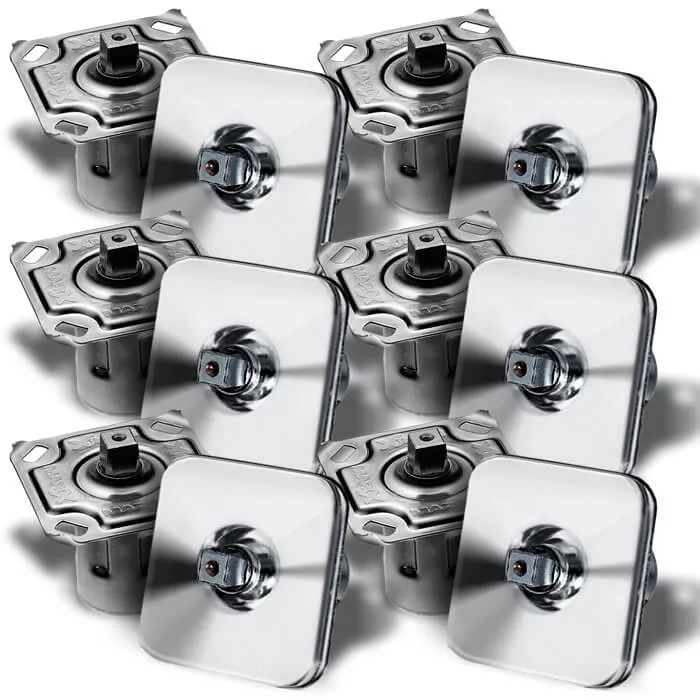
12 Marix Pivot Door Closers
UNIT PACKAGE CONTENT:
• Marix Door Closer with Stainless Steel cover
• Hardware kit for door (3x)
• Installation manual
• Cardboard cradle (2x) – Template
• Warranty term
